Thursday, August 2, 2007
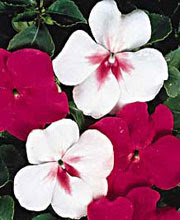
BigShot pansies
Wow! Make a huge splash in your garden with these super-sized blooms. Only a few plants will provide lots of color. BigShot pansies are easy to grow and care for. They are ideal for planting in early spring. As soon as you can dig the soil in your garden, you can plant BigShot pansies. They will withstand the light, recurring frosts associated with early spring or fall weather.
Planting & Care
BigShot Pansies are available in early spring and available in early spring and in fall if you live in the Southern US.
Space out plants about 5 inches apart, or closer if you want a very full appearance. Work slow release fertilizer into the soil prior to planting, or use liquid fertilizer at time of planting and every 2 weeks to encourage more blooming. Deadheading (removing spent blooms) can also provide more blooms over the season. Keep the plants from drying out with regular watering.
Spring Planted:
As it gets hotter, BigShot pansies, like all pansies, will start to develop longer stems and fewer, smaller blooms- referred to as ‘getting leggy’. By planting your summer annuals around your BigShot pansies, you can start to remove the BigShot pansies as they get leggy and your summer annuals get bigger and fuller. This gives you a colorful garden from early spring until fall.
Fall Planted: (Southern States Only)
You can plant BigShot pansies in September or October to add new life to your garden and extend its season through any frost you might get where you live. Depending on your location and weather variances, your BigShot pansies may continue to bloom and look great all winter. You will most likely want to plant new BigShot pansies in early spring for best blooms.
Colors and Ideas
BigShot pansies come in shades of yellow, blue, white, red and purple. With their contrasting dark ‘faces’ you will find they provide dramatic interest to any garden. Any combinations of these colors look great- and consider pairing BigShot pansies with other early spring favorites such as tulips and daffodils. Yellow blooms can be seen from far away, so keep that in mind when you’re planting. If you put yellow plants in a dormant corner of your garden, you’ll instantly brighten it up!
Don’t restrict yourself just to garden beds! BigShot pansies are ideal for container plantings. Consider filling your weather-proof container with BigShot pansies to enjoy through colder temperatures at your front door or patio.
Hot Chilly Pansies
Like all pansies, Hot Chilly Pansies can take the cold, but Hot Chilly pansies also bloom longer through warmer temperatures as well.
Planting & Care
Hot Chilly Pansies are available in early spring.
Space out plants about 5 inches apart, or closer if you want a very full appearance. Work slow release fertilizer into the soil prior to planting, or use liquid fertilizer at time of planting and every 2 weeks to encourage more blooming. Deadheading (removing spent blooms) can also provide more blooms over the season. Keep the plants from drying out with regular watering.
As it gets very hot, Hot Chilly pansies, like all pansies, will start to develop longer stems and fewer, smaller blooms- referred to as ‘getting leggy’. By planting your summer annuals around your Hot Chilly pansies, you can start to remove the Hot Chilly pansies as they get leggy and your summer annuals get bigger and fuller. This gives you a colorful garden from early spring until fall.
Colors and Ideas
Hot Chilly pansies come in shades of yellow, purple, white and red. Most colors have contrasting dark faces. Any combinations of these colors look great- and consider pairing Hot Chilly pansies with other early spring favorites such as tulips and daffodils. Yellow blooms can be seen from far away, so keep that in mind when you’re planting. If you put yellow plants in a dormant corner of your garden, you’ll instantly brighten it up!
Thursday, July 12, 2007
Trellis structure
Steps before positioning the trellis
There are different designs of trellis that can be ideal for your home garden. But selecting the ideal type of trellis depends on what type of plants will be climbing on it. While choosing the right design of trellis for your garden it is a better option to choose a strong trellis, which is also beautiful enough to embellish your garden. Trellises can be metallic wooden or of plastic like PVC pipe. Metallic posts are better than the wooden ones as they last long and doesn't get damaged easily. If you insist on wooden post it is better to layer it with a preservative. On top of the posts you can spread plastic or string net or chicken wire net. But chicken wire net has a disadvantage. Removing dead plants form chicken wire net can be a troublesome job. Long Bamboo poles can be used to climb pole beans
Some information on trellis structure
Plants should be trained to climb on trellises while they are small. Attach string on the plants and make them climb the trellis
Trellis structures should be located on the north side of the garden so that the other plants are not overshadowed.
It is better to use vertical trellis if there is a space problem.
Advantages and disadvantages of the trellis structure
Vegetables grown with the support of trellis are easier to pluck and don't get rot easily. It is because it has less contact with the soil.
Air is circulated more and it results in the healthy growth of the vegetables.
Trellises can also take care of your privacy by providing you a sort of screen from unwanted attention.
Also it can be a cool shade during the summer and give a relief from the scorching sun.
Growing plants on trellises are not without disadvantages.
Trellises should be strong enough for the windy places.
Plant that are not naturally climbers you need to train them so that they can climb the trellises.
Heavy fruit and vegetables will require more support while grown on trellises.
Thorough -watering is required for trellis-plants, as water is been absorbed quickly in this growth technique.
As trellis plants are more open to wind so it prevents pollination. So it affects the flower plants especially.
Gardening Of Fragrant Flowers
Flowers are not the only source of fragrance though they are the most common one. Fragrance can also be found in roots, oils, leaves, stalks and even seeds. It is seen in general that fragrant flowers are not bright-colored. For a fragrant flower garden always select flowers that are having thick petals as their texture. Flowers like citrus, magnolia and gardenia are the best examples.
There is a wide variety in the degree of fragrance of the same flower. It differs due to the changes in temperature, moisture content in the atmosphere. The degree of the fragrance of the flowers also depends on the time of the day and the time period of the flower blooming. For example roses smell sweet in mild damp morning and the scent reaches at it ultimate height during the afternoon and by the night the fragrance of the roses ends up. The jasmine flower can be planted in terrace or below the window of your bedroom so that the sweet smell can soothe your soul.
The fragrance of the flowers is sometimes destroyed by the climatic conditions. Less water and scorching heat can hamper the sweet smell of the flowers. Scented garden are at its height when the air is gentle and the moisture content is high in the air. Frost and rain helps to bring out the suppressed fragrance of your garden.
While gardening fragrant flowers you can also sow other type of plants like trees, shrubs, vines and perennials. Here is a list of the fragrant flowers that can make your garden heavenly. The banana shrub, Japanese privet, fortune osmanthus, sweet osmanthus, gardenia, rose, confederate jasmine, and sweet viburnum, jessamine, citrus, gardenia, rose, sweet viburnum, confederate jasmine, butterfly bush, angel's trumpet, Japanese privet and orange jasmine frangipani, Arabian jasmine, lady of the night, gardenia, Japanese privet, crape jasmine, angel's trumpet, orange jasmine, citrus, rose and sweet viburnum.
You should always smell the flowers while buying so that you can get the fragrance of your desire.
Wednesday, July 4, 2007
Steps for growing trees and shrubs
2.Mix the soil with some peat moss and fill the hole while planting the shrub in it.
3.If you are replacing the shrub from the container to the soil you should dig the hole 2 inches deeper than the roots of the plant. The soil that will be under the roots should be loosened up.
4.Put the shrub or tree from the container and put it in the hole. Fill the hole up with loose soil.
5.Then heap some loose soil around the newly sowed plant. This heap of loose soil will hold the water and help the plant to settle down deep-rooted in the new place.
6.While placing the shrub or tree in the hole hold the plant straight with a spading fork and then fill the hole with loose soil so that it is able to hold the roots tightly. The roots should be 2 inches deeper than it was in the pot before the transferring.
7.Water is the most important thing after the plant has being replanted. After replanting water your plant for 10 days consecutively if the weather is dry.
8.Trim the tree or shrub and give a shape and size of your choice. The branches should be cut above the bud in a slanting direction. In this type of trimming the shrubs repair the damage of cutting easily and grow quickly. Spray the trimmed areas with a special pruning spray as soon as the trimming is done to keep the insects and other harmful pests away.
Wednesday, May 16, 2007
Plant Diseases
Botrytis blight
• Common to tulips, it's caused by a fungus.
• Light to dark colored spots appear on part or all leaves and flowers.
• In cool, moist weather a fuzzy brown or grayish mold forms; leaves and stems distort, and often rot off at the base.
• Bulbs have dark, circular, sunken lesions; and dark brown pinhead sized pellets form on the bulb husks.
Crown rots
• Most severe in overcrowded plantings, above 70 degrees F and moist conditions.
• Leaves irises grown from rhizomes die, leaf tips form downward.
• The leaf bases and possibly the rhizomes are dry brown, and rotted.
• Leaves and stems at soil level are rotted, and bulbs are soft and crumbly.
Leaf spots
• Several disease and environmental factors contribute to spotting and blotching of leaves. The most common are the fungal and bacterial left spots.
• Fungal leaf spots are 1/4 inch yellow, red, tan, gray, brown, or black circular spots on leaves.
• Bacterial leaf spots are usually tiny, angular dark colored and may be accompanied by rotting and oozing.
Powdery and downy mildews
• Flour like patches on the surface of leaves, buds, young stems and fruits.
• They thrive in both humid and dry weather.
• The spores are spread by the wind to healthy plants.
• They cause leaf yellowing, dwarfing, stunting and deformation.
• Common on roses, zinnias, phlox, lilacs, cucurbits, apples and grapes in shaded, crowded areas.
Pests and Disease
Good gardening practices will deter pest problems before they begin
Ensure your soil is healthy by enriching it with homemade compost and other appropriate nutrients. This builds strong plants which are more resistant to most pests. See soil smarts.
Avoid planting the same crops in the same location year after year. This is especially important in vegetable gardens.
Keep your garden clean and tidy. Insects may start on nearby weeds or dead foliage and then migrate to your healthy plants.
Experiment with companion planting by growing certain varieties next to others. Marigolds, for example, actually deter insects.
Feed and water your plants regularly as directed (most annuals need weekly fertilizing). Properly nourished plants stay vigorous and are less susceptible to infestation and disease.
In spite of good pest prevention, some conditions might prevail that promote insects. Click on any of the following to determine if this pest is your problem.
Aphids
• Tiny yellow, green, or dark colored soft bodied insects cluster on the leaves, stems, and flowers.• Leaves are curled, distorted, and yellowing. Flowers are often malformed.• A shiny, sticky substance may coat the leaves.• Aphids are extremely prolific and populations can rapidly build up to damaging numbers during the growing season.• Ants feed on honeydew, a sweet, sticky substance excreted by these insects.
Mealy bugs
• Oval, white insects up to 1/4 inch long.
• Cluster in white cottony masses, on stems and leaves.
• Eggs and some adults can survive through the winter in warm climates.
• Leaves may be deformed and withered.
• Infested leaves are often shiny and sticky.
• Begonias and coleus are susceptible to several mealy bug species.
• Ants feed on honeydew, a sweet, sticky substance excreted by these insects.
Scale
• Tiny sap sucking insects that look like tiny bumps on plant leaves and stems.
• They hide under a shell cover that acts as a shield.
• They can kill plants if present in large numbers.
• Ants feed on honeydew, a sweet, sticky substance excreted by these insects.
Thrips
• Tiny insects resembling brown or straw colored wood slivers.
• Found at the base of petals in a flower bud.
• In cold climates thrips feed and reproduce from spring until fall.
• They are especially troublesome during prolonged dry spells.
• There are often silvery white streaks on the leaves.
• Flower buds turn brown and die before they open.
• Flowers that have opened are often streaked and distorted.
White flies
• Nymphs are oval, flat insects with short, sucking beaks.
• Nymphs are usually found on lower leaf surfaces.
• White flies are common to greenhouse vegetables and flowers but in warmer climates, they attack citrus and many ornamentals as well.
• Ants feed on honeydew, a sweet, sticky substance excreted by these insects.
Wednesday, May 9, 2007
Plant Nutrients
Plants, whether annuals, perennials, vegetables, fruit trees and even grass all need nourishment to grow and thrive. Nature provides a lot of the basic needs like oxygen and sunlight but if you're going to have a stellar garden, you'll need to pay attention to providing the other nutrients needed for healthy plants throughout the growing season.
Many different nutrients are important to plant development. The 3 main ones are Nitrogen (N), Phosphorous (P) and Potassium (K), plus many other elements necessary for healthy plant growth, but only in trace amounts. These are all present to a certain degree in most soils. However, like all good food the pantry can become bare if not replenished, and it's up to you to replace it. Fertilizers containing these 3 main nutrients are available at all garden centers. They come in dry and liquid forms and with varying amounts of each element. Why in varying amounts? Because plants differ in their requirements at different times. Bloomers, for example, need fertilizer high in Phosphorous. Vegetables are best encouraged by 5-10-10 since more nitrogen will promote too much foliage, leaving little nourishment to produce the fruit. Fertilize bedding plants shortly after planting, using a solution of plant starter fertilizer such as 10-52-10 to help plants become established and to promote root development. It's not really complicated, just read the labels carefully, they'll guide you to the right fertilizer for the job.
To determine the pH of your soil get a soil test kit sold at most nurseries. The pH scale runs from 0 to 14, with 7 being the neutral level. Soils that read less than 7 are on the acidic side, those higher than 7 are on the alkaline side. It is important to know the pH of the soil because it affects the soil chemistry and plant metabolism, which in turn will determine the success of your garden. Most plants will perform well in soils with a pH between 6.0 and 7.5.
Nitrogen (N)
This nutrient is responsible for the healthy green color of your plants. It is an essential part of proteins and chlorophyll, the plant pigment that plays a vital role in photosynthesis. Nitrogen deficiencies result in a yellowing of leaves, and a general slow down in growth.
Phosphorus (P)
Phosphorus promotes healthy root growth, fruit and seed development, and increased disease resistance. Plants with a shortage of phosphorus are often stunted, have dark green foliage, followed by reddening of the stems and leaves. The symptoms generally appear on the older leaves first.
Potash (K)
Calcium, magnesium, and sulfur
Iron, manganese, copper, boron, molybdenum, chlorine, zinc
Weed Control
Beating the weeds
Mulching
After the mulch is applied, you don't have to hoe between the rows. Mulching can reduce the water required to one third of the amount throughout the growing season. The soil stays evenly moist under the mulch. And as the organic mulches decay, they improve the soil. For mulching to be effective it should be approximately 3 inches thick. Organic mulches include straw, peat moss, sawdust, dry manure, leaves, pine needles, grass clippings, wood chips, and bark chips. Inorganic mulches include aluminum foil, newspaper, and polyethylene film. Mulching will help to keep plants healthy, and will keep your garden looking beautiful.
Weeding around seedlings
Annual weeds
Annual weeds germinate, flower, and die back in one season. However, their seeds are extremely plentiful and are spread by gardeners, mulches, manure, compost, birds, animals, wind, and rain.
Common annual vegetable garden weeds are chickweed, cheeseweed, wild oats, wild barley, mustards, shepherds purse, sowthistle, annual bluegrass, clover, groundsel, nettle, crabgrass, night shade, horseweed, purslane, fleabane, lamb's quarters, prickly lettuce, milk-thistle, sweet clovers, bristly oxtongue, and barnyardgrass. A single barnyardgrass weed can produce over 1 million seeds in its short life.
Perennial weeds
Perennial weeds live through winter, although they may die back. They reproduce from underground bulbs, rhizomes, or crowns on taproots. Perennial weeds interfering with crop growth include nutsedge, witchgrass, bermudagrass, dallisgrass, milkweed, field bindweed, Johnsongrass, and ozalis. If some of these names seem familiar, it's because what's considered a weed in vegetable gardens may be considered grass in front yards.
Unfortunately, grass seeds germinate as well in a vegetable or flower garden as they do in a lawn. Sometimes even better, if you keep the garden soil in top condition. All that open space provides much less competition for weed growth than that offered by a crowded front yard lawn.
mulching
Spring Planting Tips
And you can start planning before the snow melts
Planning your gardenFor beginners it is important to draw a
garden layout plan
• Choose plants suitable for the site (sun vs. shade, soil, etc)
• Arrange plants according to their height
• Arrange according to plant form and texture
• Arrange according to flowering periods for constant blooming
• Arrange in groupings by type and color considerations
Soil preparation
Prepare flower beds by spading deeply.
Loosen up heavy clay and clay loam soil with addition of
peat moss, sand, ground bark or compost. Add about 2 lbs
of 5-10-5 fertilizer per 100 sq ft or 1 lb of 10-10-10 per
100 sq ft and turn the soil over again. Then rake it smooth,
and the bed will be ready. For more information see soil smarts.
Preplanting care
If you buy bedding plants but can't plant them
the same day, water packs or flats thoroughly and put them in
shade to prevent excessive wilting. Evenings of cloudy days are
the best times to plant. If you have to plant during the heat of the
day or on sunny days be sure plants are watered thoroughly
immediately after planting.
How to plant
Annuals come in market packs, pop out packs,
trays, flats or individual pots. Choose plants that are dark green,
vigorous looking and short in height. If plants are in individual
containers, gently separate plants keeping as much soil around
the roots as possible. Plant the root ball below the soil line.
Plant individual peat moss pots slightly below the soil line to
keep the pot from drying out by exposure to air.
Watering
Bedding plant annuals are thirsty plants.
Water them thoroughly to give them a good start. Thereafter
water whenever the soil begins to dry. Do it early in the day.
Don't be satisfied with just sprinkling the foliage since plants
will not receive enough water, and moisture on the foliage for
more than 24 hours encourages plant disease.
After planting care
To promote bushy, vigorous growth and more
continuous blossoming, pinch out the central buds of annuals such
as tall snapdragons, zinnias and marigolds. The tops of plant which
tend to vine such as petunias should be cut back to 3 to 4 inches when
they are too tall. Fertilize every 3 to 4 weeks (1 pinch per plant or 1 lb.
per 100 sq. ft. of 5-10-5 fertilizer).
Vacation tip:
Cut your plants back before you leave and when you
return they will be fresh, thriving and vigorous.
Wednesday, April 25, 2007
Growing Chrysanthemum Flowers
Chrysanthemum is among the most vibrant colored fall
perennial plants.
It can be of varied color type or size like white, pink, yellow,
lavender,
bronze, salmon, orange, or red. These petals of the flower can
be either
single or in daisy form.
Tips on growing Chrysanthemum flowers
1.While buying chrysanthemums select plants having plenty flower buds.
2.It is better not to choose a fully bloomed plant, as their span of
blooming is shorter than the partially
blooming chrysanthemums.
3.Separate the branches from one another and sow the stems of
perennial flowers, which are having healthy roots.
4. The adequate soil of this fall flower is well-drained soil. You need
to add compost to the soil once a year.
Apply one-pound fertilizer per 100 square feet of chrysanthemum
bed during the growing time to have a full blooming garden
of chrysanthemums.
The fertilizer should be mixed within 6 inches
of the soil to have a healthy growth.
apart form each other.
30 inches of spacing from one another.
inches long strip off one or two inches of the stem.
The practice of
stripping off an inch of the stem should be continued
till the beginning
days of August.
This is done to have bushy low plants. Don't do the
stripping very late because then the stem will not
be long enough for the blooming of
fall chrysanthemums.
Do thorough watering so that the roots evenly
absorb the fertilizer.
Cactus Plant Care
all over the world is cactus. Cacti are also known
as low maintenance plants. It is the best indoor
plant type, as they require little attention for
their healthy growth. There is a wide variety
of shapes, sizes and color of cactus. Cacti are
called as perennial plants because they will be
growing year after year.
Cactus plant care
Potting
Cactus should be placed under adequate sunlight.
They should be sowed in pots having a good drainage system.
Remove one inch of soil form the top. Replace it with gravel.
The soil should be a mixture of sand, peat and perlite.
Cactus growing vertically should be sowed in container
whose diameter is half the height of the plant.
- Cacti that are growing breadth wise should be
- grown on containers, which are having 2 inches
of diameter extra than the plant
Recently sowed or repotted plants have more
chances of getting rot.
The soil should be dry enough while the sowing or repotting
is been done. Watering should be done after a week so that
the roots are healed within the time.
Cactus grows very slowly. Some cactus takes a year
to germinate and to know how they look like it takes
again some years. They can breed through branches
or from a part of the plant. The part of the plant is
removed from the main plant and dried for 2 weeks.
After the cut portion is healed then it is planted in shallow soil.
Watering
Cactus needs less watering so water them when they dry out.
It is better to use clay pots without any glaze, as it needs less
water than glazed or plastic pots.
Most of the cactus plant type requires a period for rest so
that they can flower the rest of the year. The exact time
required for cactus plant keeps varying but in general it
is within three months. They are quite friendly to the chill
weather and during the winter they should be watered less
with no fertilizer application.
Wednesday, April 18, 2007
What To Do in the Garden in April
If April means spring to you, get out your garden tools
and get moving. As always, we’re slaves to the whims
of nature. It always seems spring drags its heels and
then runs full force into summer. Be prepared with
an organized ‘To Do’ list and take advantage of
whatever nice days we are afforded. Our plants
will still need pruning, feeding and weeding even
if the sun doesn’t always shine.
Where it’s Spring
- Keep ahead of the weeds.
- Turn the compost.
- Sharpen Tools
- Test and amend your soil
- Prune flowering shrubs when they finish blooming.
- Plant and divide perennials
- Think about mulching and protecting tender
plants for winter
- Keep watering trees and shrubs until dormant
- Now’s a good time to work on the lawn
Friday, April 13, 2007
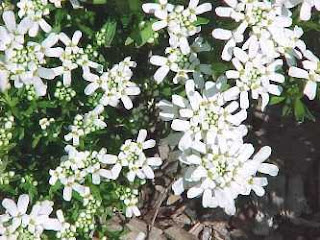
Candytufts
become all-purpose perenniels with an ability to adapt
themselves to every region in the United States.
With their whiter-than-white blooms
(which also come in pink or lilac) candytufts are among
the best flowers for cutting & arranging.
Depending on the variety, versatile candytufts can be
either planted in backyard flower beds, rock gardens
and along edgings, or used in pots, containers,
hanging baskets or window boxes.
Candytufts prefer full sun - although they will tolerate,
but not bloom as well, in part shade.
The one thing candytufts will not tolerate is being waterlogged,
and are known to quickly develop root rot if not grown in
especially well-drained soil.
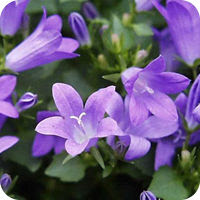
Bellflowers
Bellflowers are named for the distinctive shape
and are part of the family campanula which has
its roots in the Latin, campana or "bell."
Popular varieties seen in rock gardens and along
flower edgings are the Harebell and perhaps most
notably, the Canterbury Bell with its associations dating
back to Chaucer and medieval times.
Offsetting their delicate form are the vivid colors of
many varieties of bellflowers - ringing out in vivid blue,
violet, pink, rose, gold or white.
Bellflowers prefer well-drained soil and, for most varieties,
a partly shady spot in the garden will usually do. Blooms
begin in mid-summer and last until the first light frosts of autumn.
Hardy perennials, bellflowers usually don't require protection
or mulching for overwintering.
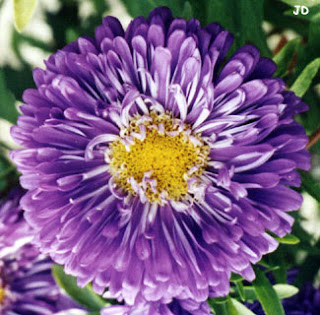
Asters
Asters meaning "star" in Latin, are sometimes commonly
called "colored daises" - but they are actually part of the
same family as sunflowers as seen in their deep yellow
centers - with brightly colored petals in white, lavender,
purple, pink or red.
Perennial asters prefer well-drained soil with full or partial sun.
With seeds slow to germinate, asters can be started
indoors 6-8 weeks before the last frost date, or thereafter
planted directly into the soil. As they establish themselves
they form in to bushy clumps which after a few years should
be divided and transplanted.
Perennial asters and mums both benefit from pinching back
to extend the growing season, resulting in a bushier plant
and a profusion of flowers. Begin pinching back in mid-June,
but curtail any pruning after early July, or it will have the
opposite effect : leaving the plant without any blossoms in the fall.
The "star" of the autumn garden, perennial asters are
a mainstay in any flower garden and provide colorful blooms
at the end of the summer just when most other flowers are fading...
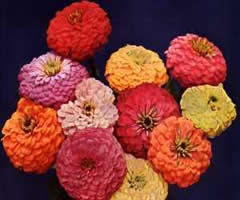
Zinnias
Zinnias get their name from 18th-century German
botanist Johann Gottfried Zinn, who wrote up the
flower's first scientific description. Zinnias are native
to Mexico, where Aztecs originally dubbed these
flowers mal de ojos - hard on the eyes.
It's an apt description, since zinnias come in some
many vivid colors (except blue) that they'll brighten
up any corner of your garden, even on the cloudiest days,
and prove to be a sure-fire magnet for butterflies.
Easy to grow and drought resistant, they are second
only to sunflowers in popularity as kids' school or home
projects. They are are also the perfect cut-and-come-again flower.
The more you cut zinnias, the more they bloom!
Zinnias also make for an excellent dried flower and holds its
color and shape long after being cut.
A secret to growing success with zinnias is to provide them
with plenty of light, airy soil since they intensely dislike the
"pinched toe" effect caused by planting in hard, compacted earth.
Another common problem with zinnias may be mold or
mildew caused by too much rain or watering from above.
To prevent this from happening, simply give your plants a
gentle shake to dispel any drops that have settled on them
after watering or heavy rainfall....
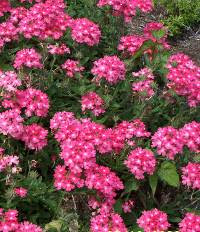
Verbena
Verbena is that no-muss, no-fuss annual with
the deep green leaves and delicately domed
blossoms - and a reputation for being almost virtually carefree.
Heat and drought tolerant, verbena is as easy to find
in local greenhouses as it is to sow directly from seed.
At home in rock gardens or as edging, verbena's small
size also make it a favorite for planting in hanging baskets
and window boxes, where it will bloom continuously with
just a little help - pinch back dead blossoms as often as
they appear to keep verbena flowering throughout the summer...
Thursday, April 12, 2007
Sunflowers
a single summer and produce flowers more than 2 feet across!
What better way to teach kids how to garden?
With a curious habit of facing the rising sun in the
East, sunflowers provide not only excellent lessons in sun,
earth & sky, but a healthy reward. The copious seeds that
sunflowers produce provide for a fun and nutritious
snack, as well. Little wonder that sunflowers are usually
popular favorite for backyard garden fun or classroom learning
project.
In addition, sunflower seeds are large enough for little fingers
to handle, meaning sunflowers are easy to plant. Just add
water, and stand back!
Just remember to stake them early on to support them
properly throughout the summer, and provide lots of sun
and water as they rapidly grow...and grow...and GROW...
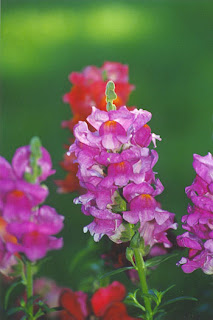
Snapdragons
Snapdragons often hold happy childhood
memories for many adults who grew up in
gardening families and who can recall learning
how to hold the snapdragon's "jaw" for the
first time - and watching it snap back!
The Latin name for snapdragon is Antirrhinum majus -
or "snout-like" - which describes the snapdragons
long probiscus of a bloom which is habitually the
favorite of bees, birds & butterflies.
With a delicate root system, snapdragons thrive in rich,
frequent watering.
Although snapdragons come in a variety of colors and
sizes, the larger types usually need to be staked properly
to keep them standing tall througout the growing season ...
Petunias
Petunias have been popular for years, and its easy to see why.
With a general habit to cascade, the larger types are
ideal flowers for pot containers or hanging baskets.
In this way they can be transported anywhere a splash
of color is needed in a garden, porch, balcony,
or windowsill where they can receive full sun to partial shade.
The main types are grandifloras, multifloras & millifloras,
each with their own characteristics and growing habits,
although all are generally easy to grow, come in a variety
of eye-popping colors (or multicolors), and bloom all summer long.
As the name suggests, grandifloras produce large blossoms -
sometimes up to 6 inches across - although they won't flower
as much as multifloras. The larger, delicate blooms also
usually don't stand a chance against heavy summer rains.
Near summer's end, larger size petunia plants usually
need to be cut back to avoid becoming straggly and to
promote new blooms.
For smaller gardens, and much easier care
(with no need to prune or pinch back), millifloras
have been developed as a new addition to the petunia family,
Their compact size makes them ideal for edging or
groundcover with blossoms a mere 1 1/2" across...
Wednesday, April 11, 2007
Nasturtiums
Nasturtiums are those spicy (and delicious!) plants
that will grow in any fair amount of sun and practically
any soil condition in a backyard, pot container or hanging basket.
The proper way to pronounce them is ne-STUR-shums,
- but no matter how you say it - they are the flower most
gardeners choose for areas in which most other plants
don't stand a chance.
Rugged, pretty, and very high in vitamin C, you can
have your nasturtiums and eat them, too. The peppery
flavor of its leaves & flowers are widely used in salads, soups and sauces.
Nasturtium's spicy character is also reported to ward
off some garden pests such as cucumber beetles,
although aphids may become a problem for nasturtiums
at the height of the season.
They only thing they will not tolerate is soggy soil -
so water sparingly - and look forward to blooming success
with nasturtiums all summer long...
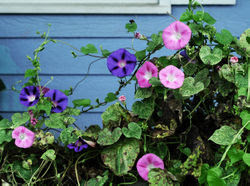
Morning glories
of care, but for their incredibly rapid growth -
as much as 15-20 feet tall in practically no time at all...
As such, morning glories can often be seen climbing up
trellises, providing shade for country porches or decorating
chain link fences in town.
So called because their flowers open as the first rays of
sunshine appear over the horizon, the morning glory
belongs to the Convolvulaceae or sweet potato family.
However, families with young kids or pets should
be aware that morning glory seeds are considered
poisonous and may cause digestive upset, stupor,
hallucinations or even coma if enough are ingested.
Since seed coats are very, very tough, they should be
soaked overnight before planting. Pick a sunny spot in
prepared soil and plant about 1/2 inch deep and
12 inches apart. If no trellis or support is handy at
the time, you can plan on having to install one... very soon!
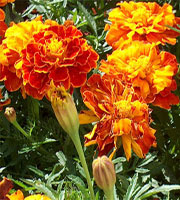
Marigolds
Marigolds are incredibly popular not only for
their easy-going disposition, but their rapid
growth in any sunny spot in your garden or windowsill.
In fact, if you dote over marigolds you may get lush,
green growth at the expense of flowers. Their bright
orange or yellow blossoms are known to attract
butterflies from miles around.
Although science has yet to prove it, the old wive's tale
points to marigolds' beneficial effects in dispelling common
insect pests from the garden.
However, slugs & snails find marigolds extremely tasty
and may gobble up an entire crop if left unchecked.
An excellent edging or border plant, marigolds easily
tolerate reflected heat from garden walks or pavement,
and usually withstand drought conditions without a fuss.
Be sure to deadhead marigolds to ensure a longer blooming
period throught the growing season ...
Impatiens
Impatiens are not, as widely supposed, named
for their fast growth (although they are one of the
easiest garden plants to maintain) but more for the
plant's seed pods which, when touched, may suddenly
"explode" to disperse its seed in all directions.
Also called "Touch Me Not" or "Buzzy Lizzy" impatiens
are second only to the petunia for ease of growth whether
in backyard gardens, windowboxes, containers, pots or in hanging baskets.
You can choose from among wide variety of colors for
spring planting - including white, pink, red, orange, purple, lilac, and rose
Impatiens walleriana, and Impatiens balsamina are
currently the only two varieties widely available among some 1,000 species of impatiens known....
Four O'Clocks
Four O'Clocks, as the name implies,
possess the curious habit of opening its blooms
in late afternoon, remaining open all through the night.
Four o'clocks planted in full sun are likely to do well
anywhere, although ideal conditions will naturally often
produce a healthier plant and many more blossoms!
Perhaps the real beauty of four o'clocks is that often their
delicate appearance belies their tough resistance to prolonged
drought & poor soil - along with a steely resolve against smoke,
fumes and other atmospheric pollution.
In country backyards, hummingbirds are often attracted to
the plant's long, tubular blossoms. It has also been reported
that the leaves of the four o'clock also irresistably draw
japanese beetles to them in a fatal attraction that poisons
the little garden pests.
Four o'clocks should be planted directly into the ground
in early spring. Although usually listed as an annual,
four o'clocks are very efficient about reseeding themselves,
and for all intents and purposes are perennials that don't need
replanting year after year ....
Forget-Me-Nots
Forget-Me-Nots are scientifcally known as
myosotis or "mouse ears" and one look at their
small blue petals and you'll know why.
But... how did they come to be known as forget-me-nots?
Legend has it that the name derives from medieval times,
when a knight and his lady were walking along the side of
a river. As the story goes, the knight picked a bouquet of flowers
for his love, but because of the weight of his armor he fell
headlong into the river. As he was drowning he threw the
bouquet to her and desperately shouted "Forget-me-not!"
Ever since, the flower has been associated with expressions
of undying affection between loved ones. Today, there are
about 50 known species of forget-me-nots. Most variations
fit the description of a light sky blue five-petaled flower that
blooms in spring, but other colors have since been developed
including white and pink.
Easy to grow from seed, they prefer a rich soil, but generally
don't mind overcrowding and are a favorite to grow in lightly
shady areas under large trees or in rock gardens ...